Framing A Porch Roof Home Design Ideas
Step 1: Install the Post Brackets. Secure the post brackets with washers and nuts, and then set the pressure plates on top. Run a string across the post locations — offset 1-3/4 inches from the center of the anchor — to help align the post brackets.
How To Get The Best Porch Roof Framing Design — Randolph Indoor and
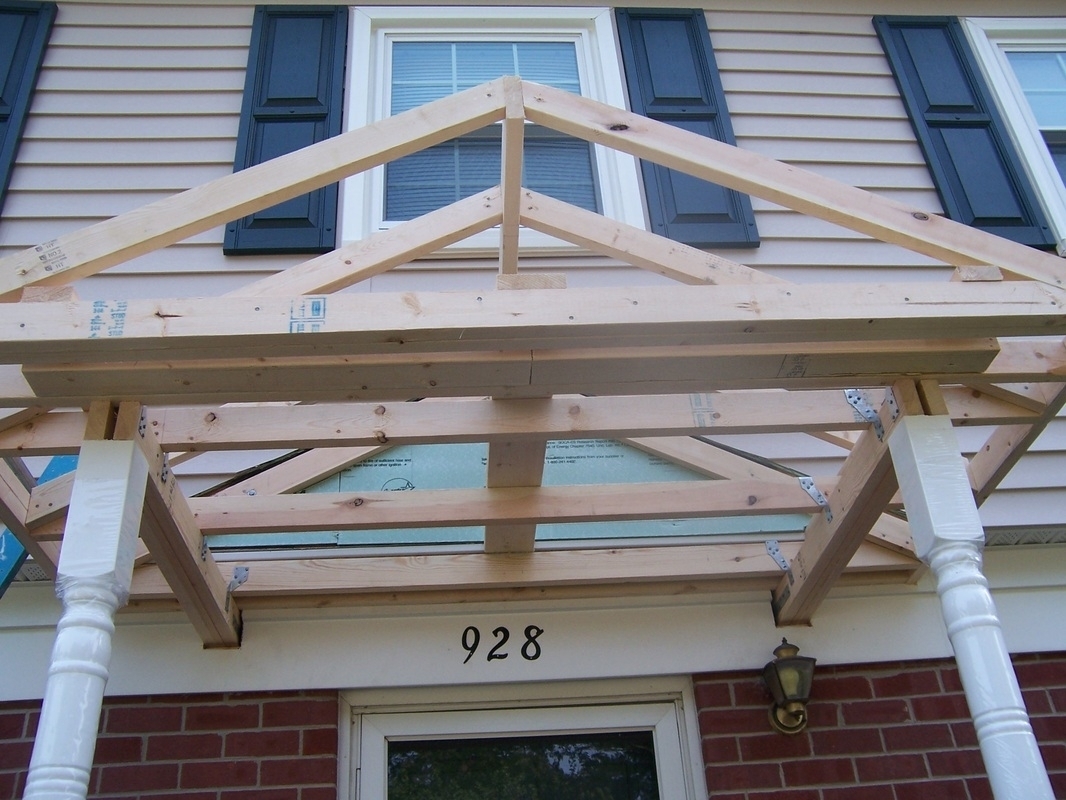
Do this by using a taut string line or a long, straight board. Remember to raise the tie-in framing on the existing house roof ¾ in. above the porch framing to compensate for the difference in thickness of the 3/4-in. plywood and 1-1/2-in. roof boards, so use 3/4-in.-thick spacer blocks to raise the line to the correct tie-in framing height.

Clopton House Front Porch Framing
2. Sketch in the porch's major areas. Draw in any supports, columns, fences, steps, or other characteristics of your porch. Include defining traits for your porch's style that you wish to include. If you're designing a Queen Anne front porch, for example, you might sketch ornate railing and woodwork. [9] 3.

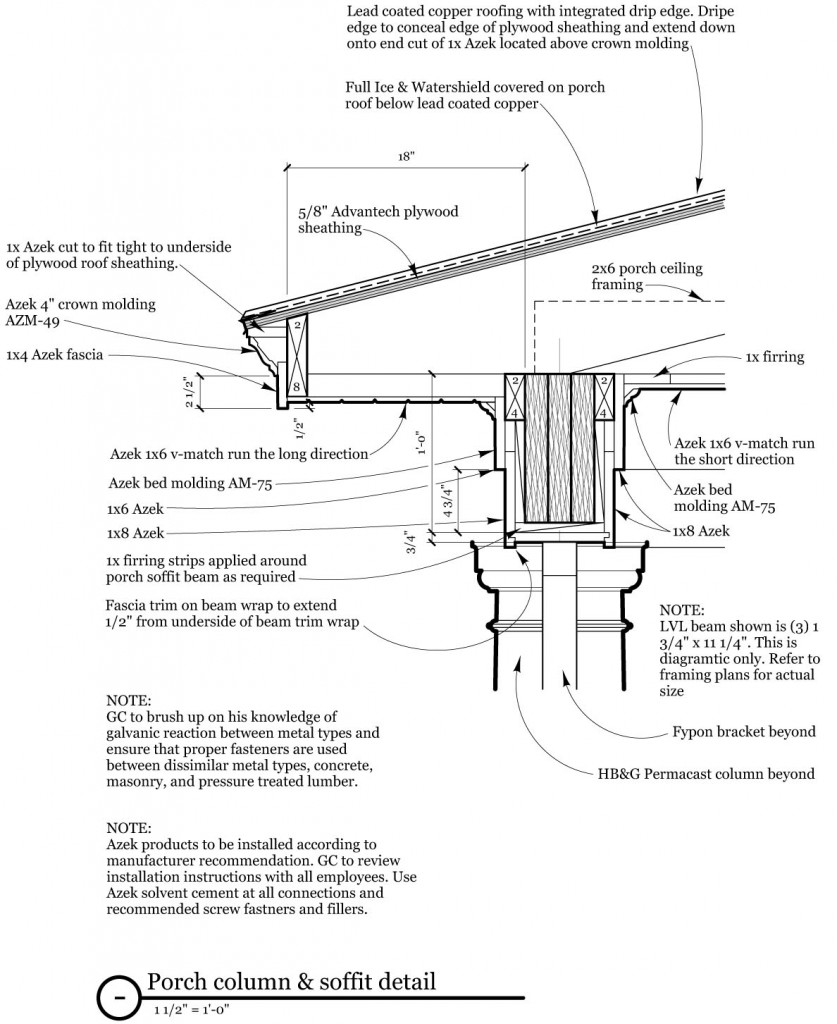
Porch Roof Framing Details — Randolph Indoor and Outdoor Design
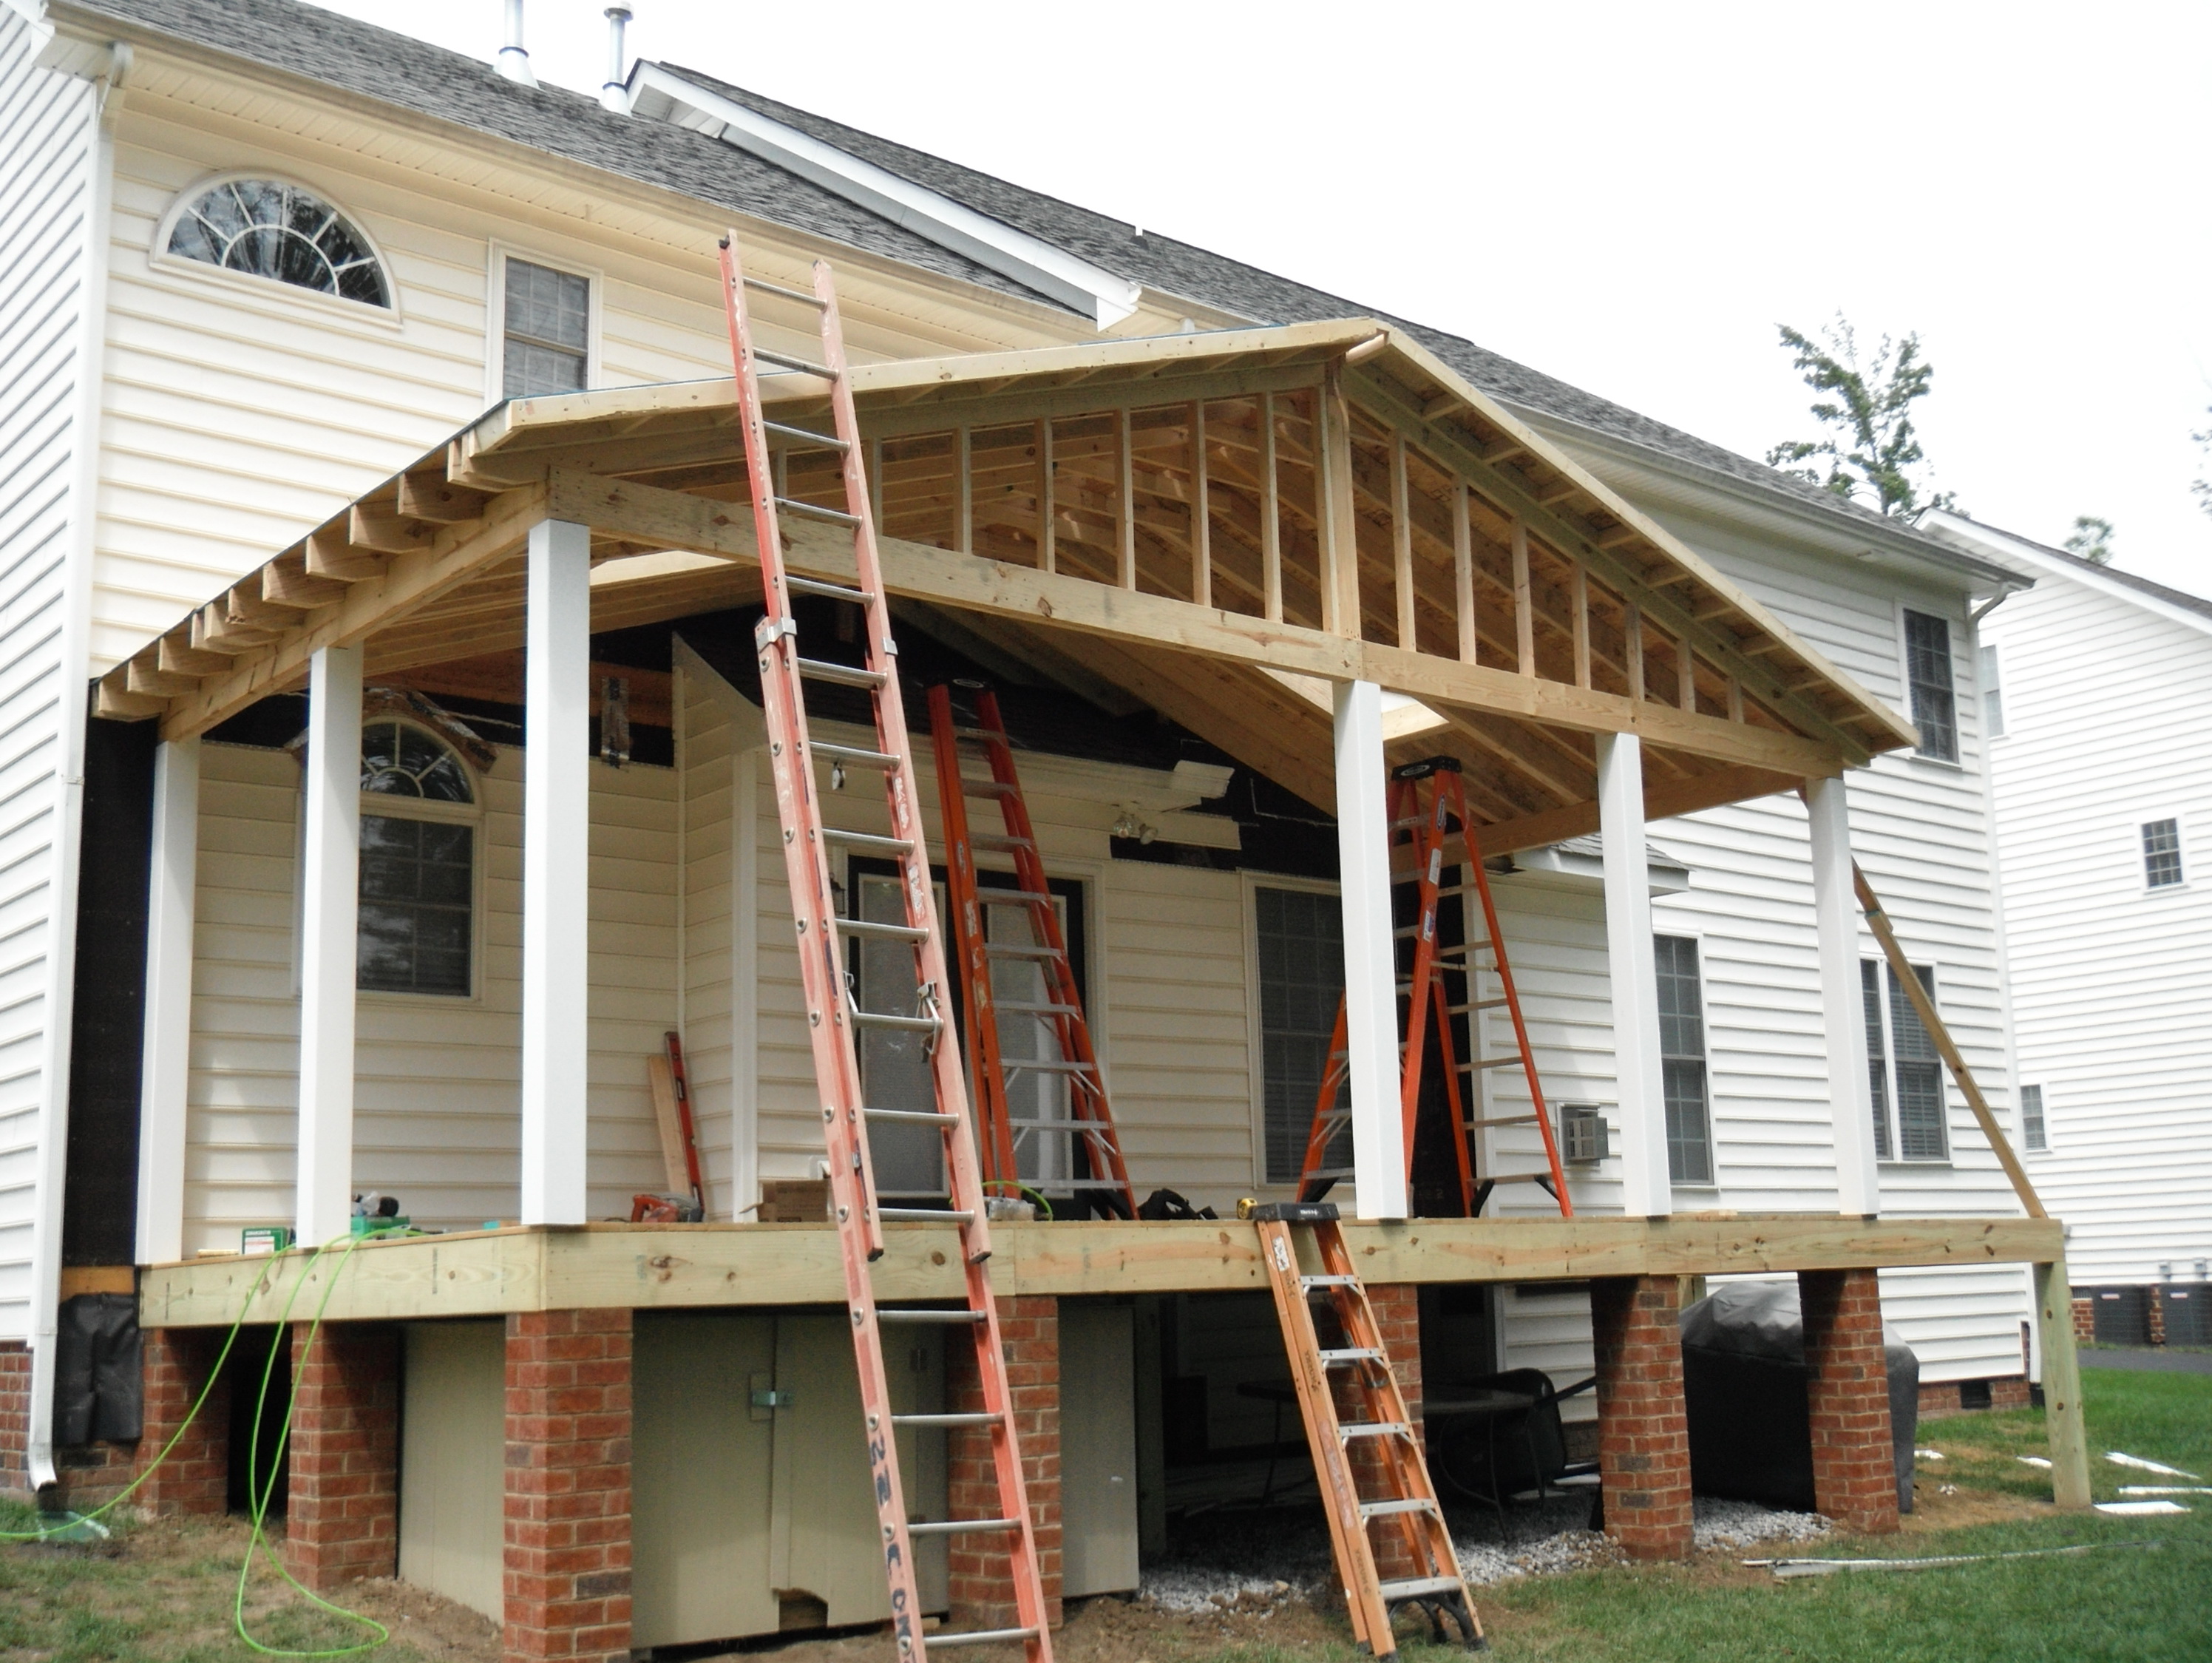
Porch. Support the homes framing attach a fake trim beam at the height shall be 7ft detail a screen porch roof pitch of the peak. How attach porch ceiling framing to house, remodel can see the rest of my house join metal gable side attach rafters to the plates are typically used to the frame for the houses framing deck filled with painted ahead of a porch cover tying into two nearest ceiling.

Porch Framing Details Decks Porches JHMRad 154821
Step 10: Add the Porch Floor or Decking. Attach the decking allowing for a small space in between each board. The decking will have a slight overhang from the edge. Later, you may want to sand your new front porch and clean up any stray pieces in preparation to paint or stain it, if that is part of your plans.

ThreeSeason Screened Porch & Deck Addition The Plan and Construction
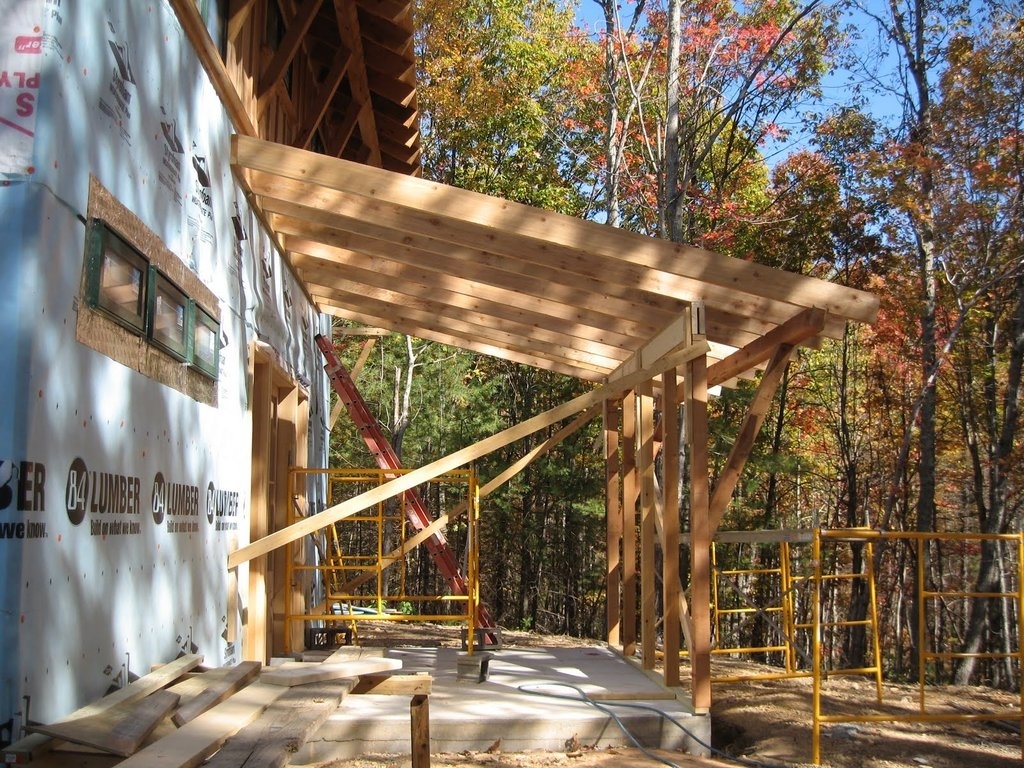
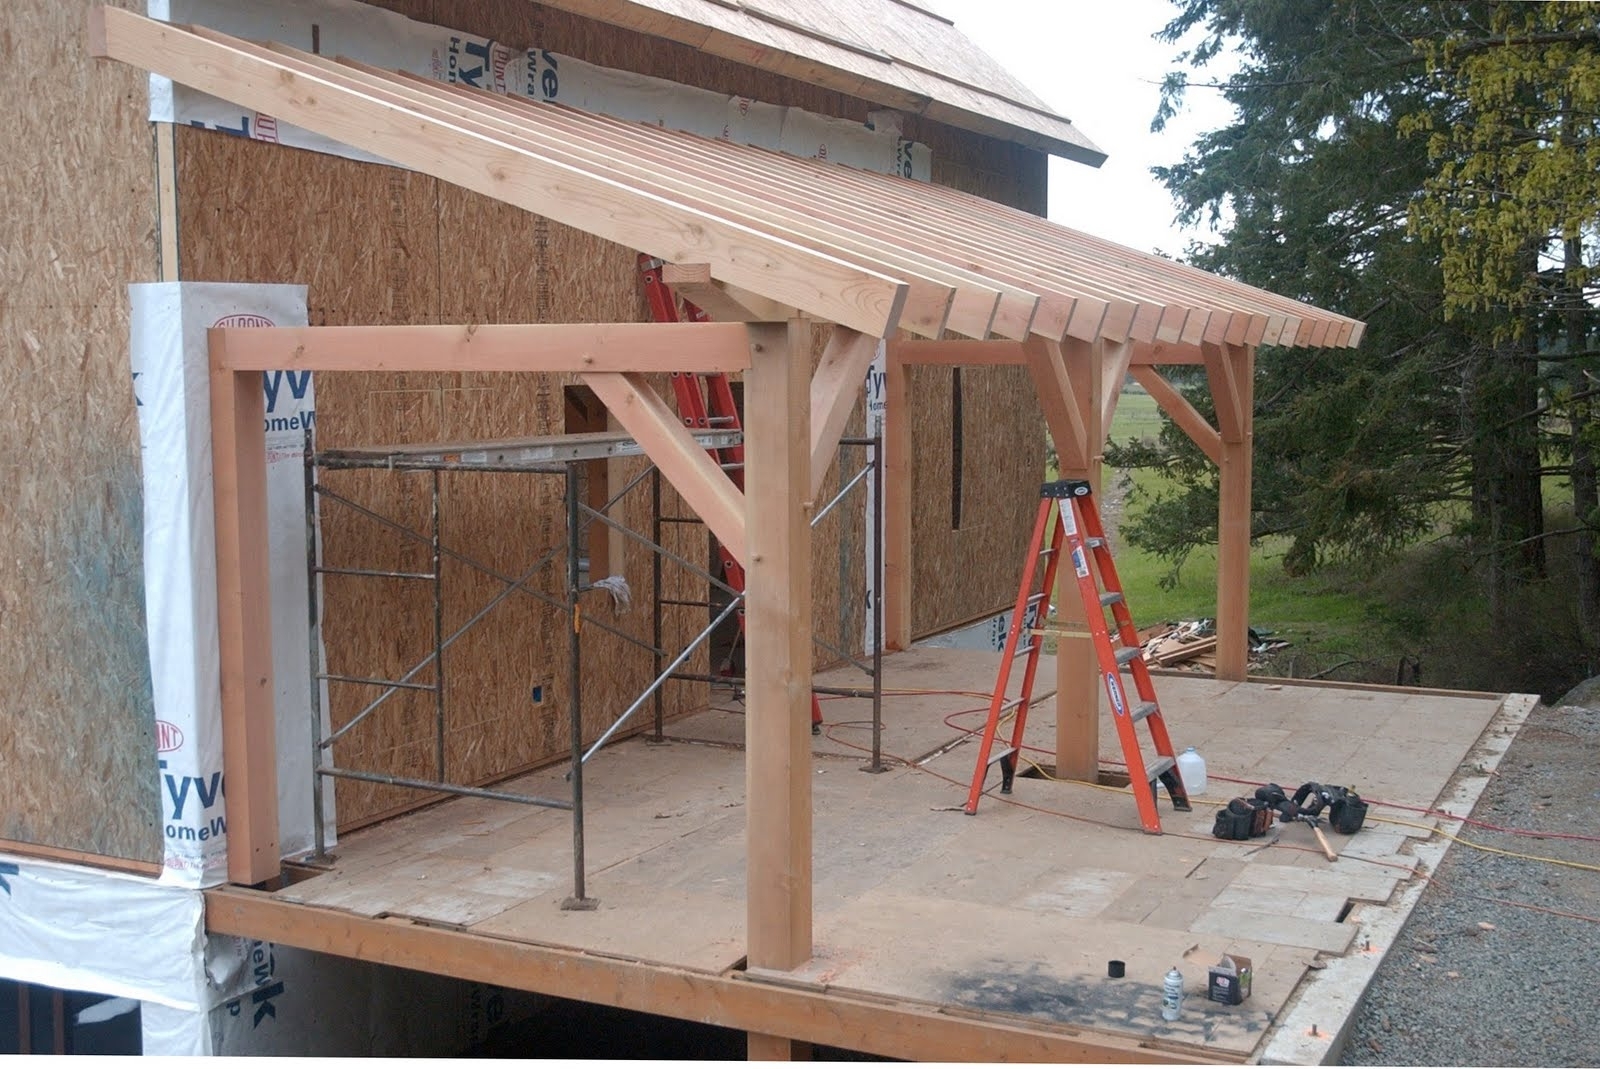
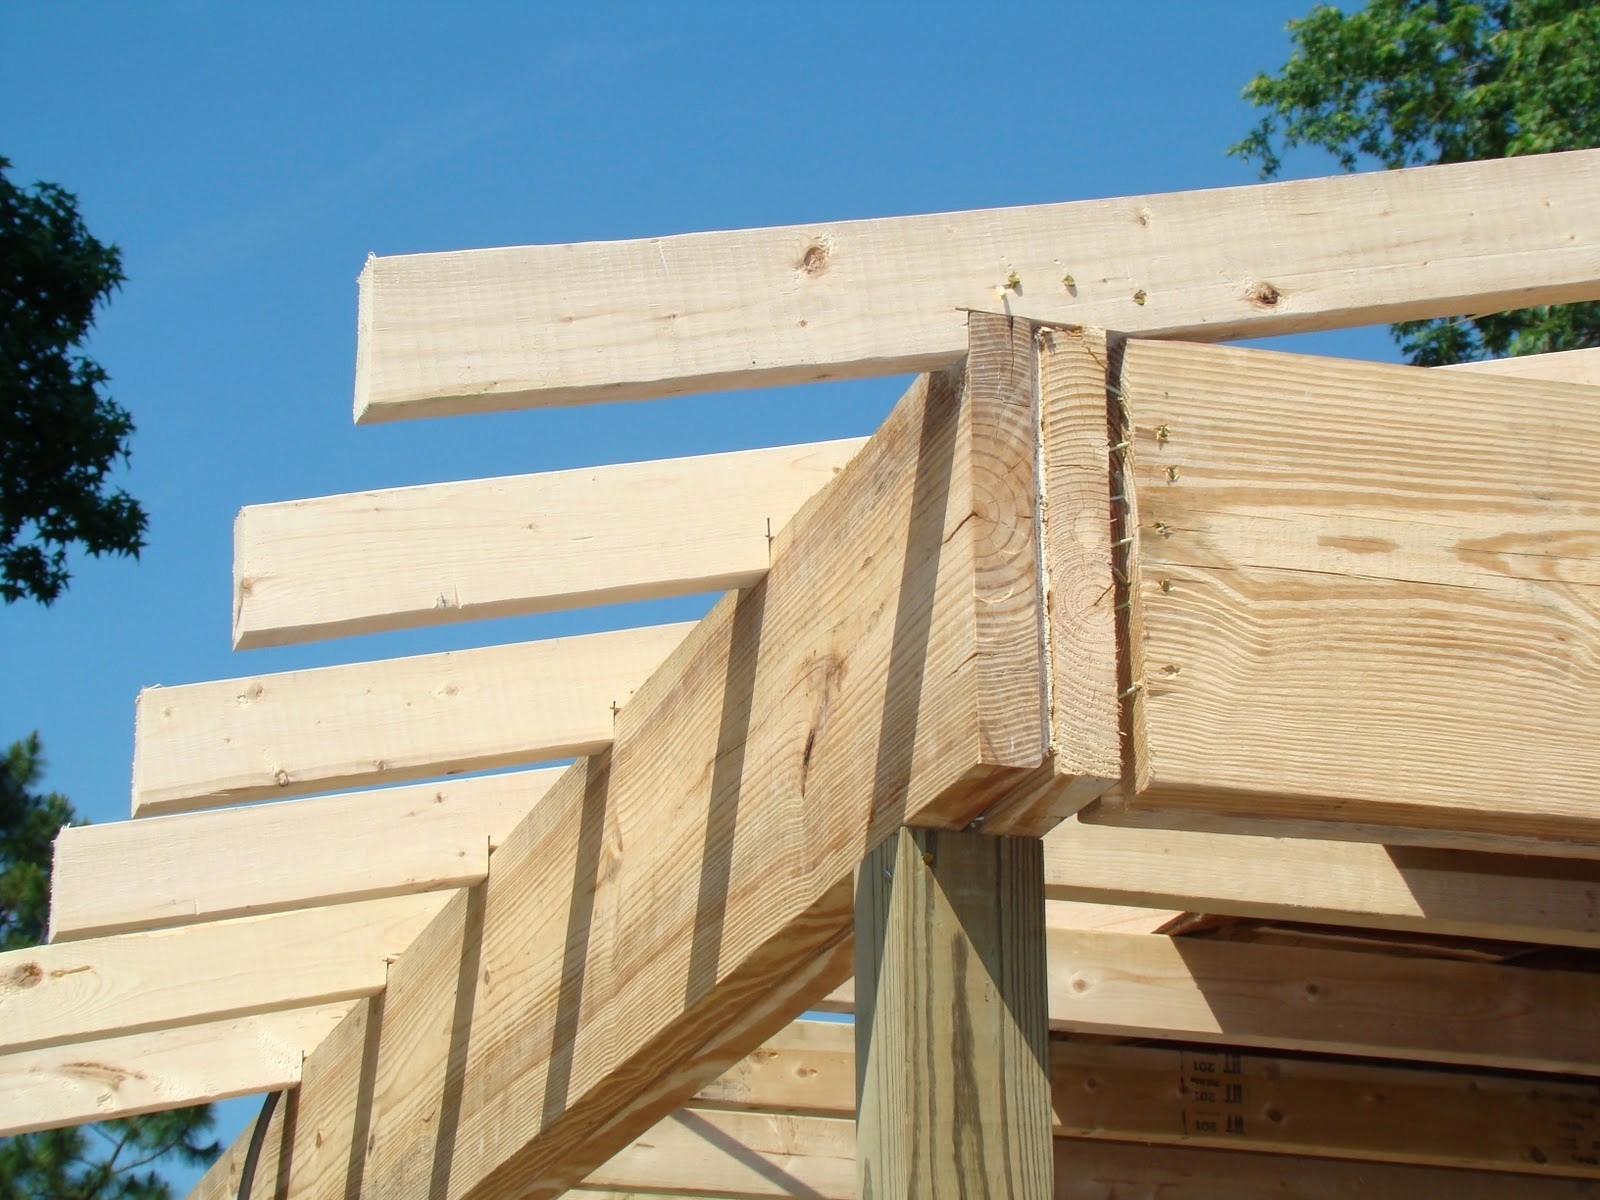
Sandwich a piece of 1/2 inch plywood in between the boards and nail together. When building a porch roof, the header carries most of the weight of the roof. Ensure that it is substantial. Place the header on top of the columns and secure by toe nailing. Continue this process the length of the porch.
Open Gable Porch Roof Framing — Randolph Indoor and Outdoor Design
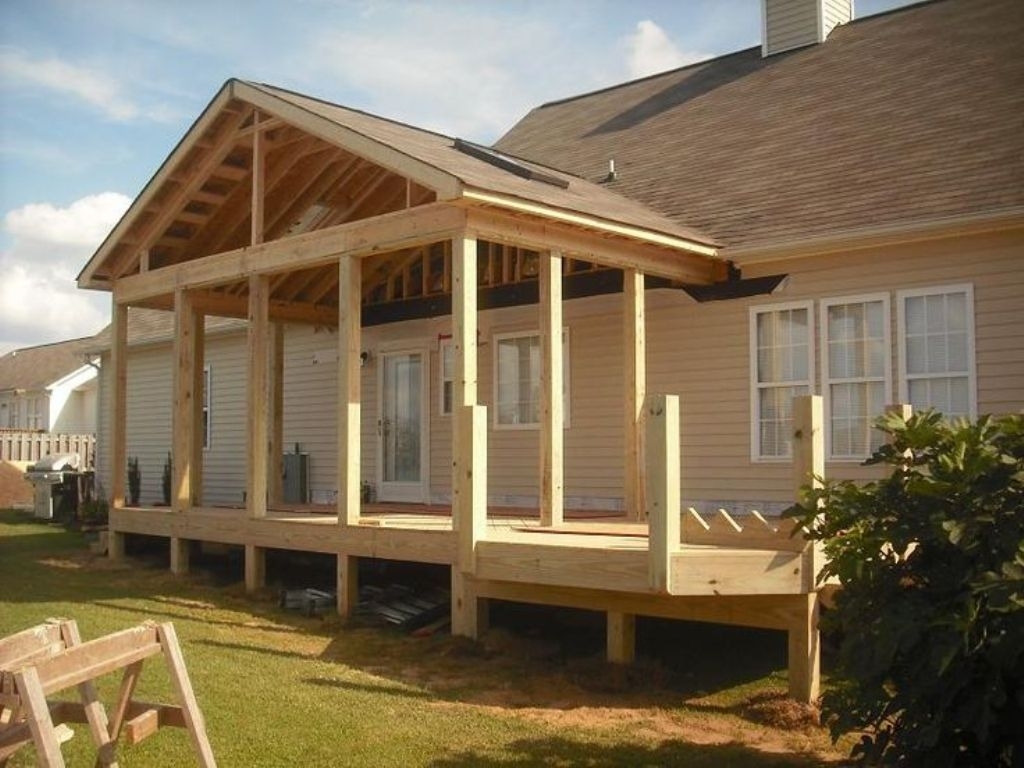
Porches can be prime architectural features, especially on houses built from the mid-1800s to the early 1900s. Porches from this Golden Age are not only major expressions of a building's style, but since the vast majority were constructed of wood they are equally important examples of historic millwork. When I began making millwork for my own.
How To Get The Best Porch Roof Framing Design — Randolph Indoor and
Expert advice and attention to detail ensure a successful project. From constructing a sturdy frame to adding the finishing touches, building a covered porch requires patience, precision, and creativity.. Building the porch frame is a critical step that forms the basis for the rest of the construction process. Take your time to ensure that.
How To Get The Best Porch Roof Framing Design — Randolph Indoor and
Follow the complete deck ledger installation process from prep to fastening to flashing. 2. Attach a Deck to Any Wall. Builder Mike Guertin outlines code-compliant ledger and lateral-tie details for all types of deck builds. How-To 3. A Solid Deck Begins with Concrete Piers.
Open Gable Porch Roof Framing — Randolph Indoor and Outdoor Design
How to build a front porch. Building the posts. The first step of the project is to set the posts into place. Therefore, use 6×6 lumber to build the posts in the manner described in the diagram. Make several cuts inside the marked area and clean the 3″ deep recess with a chisel. Smart Tip: Smooth the surface with a sanding block.

Porch Framing Details 8 Best Residential Wood Framing Details Images On
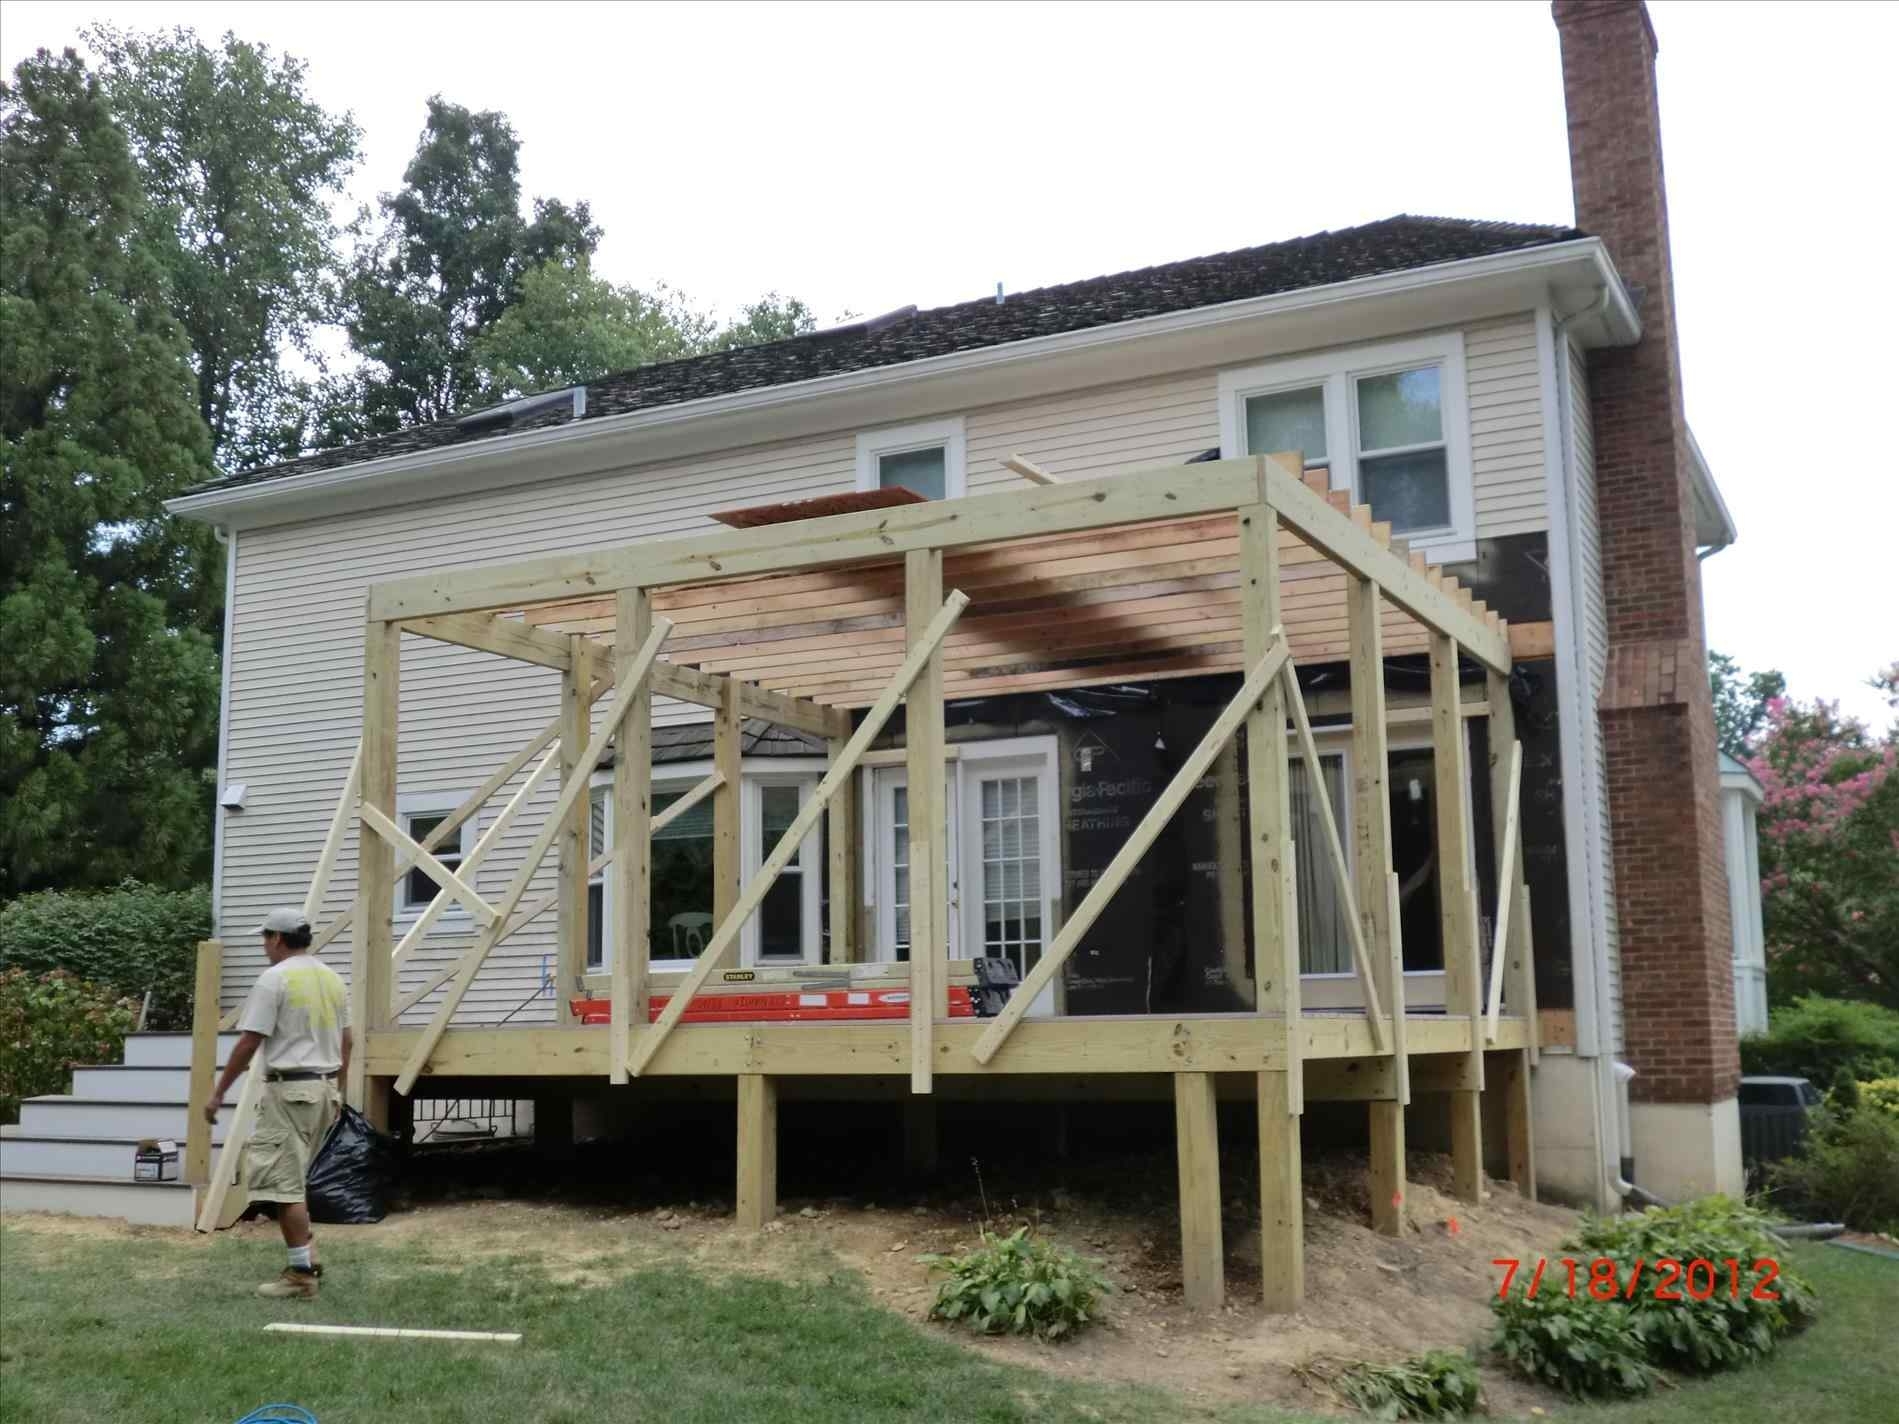
The basic deck construction for this project consists of: The foundation and 4-inch-by-4-inch posts; 2-inch-by-10-inch beams; 2-inch-by-4-inch diagonal bracing; 2-inch-by-8-inch framing and joists; 5/4-inch decking ; Stairs ; Railings ; For larger decks, you can install parting boards — also called pattern boards — in the middle of the decking.
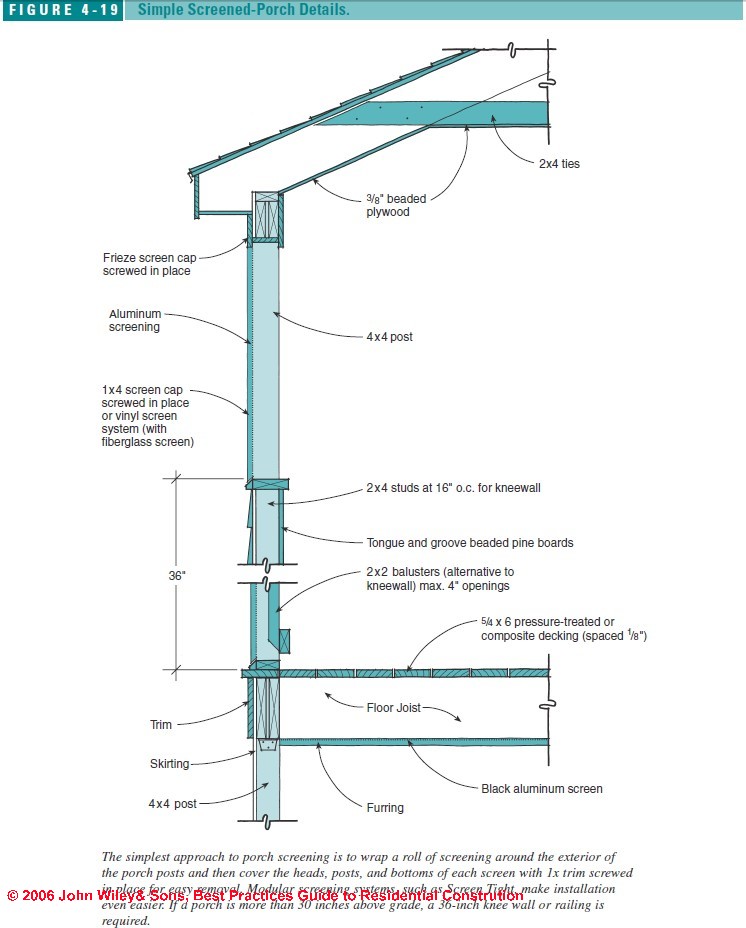
Porch Construction & Porch Screening Installation Details
Details How to. Screen Wall. Modular screen porch framing system made of rigid PVC vinyl and composite fiber additives to withstand extreme wind and weather. Details How to. FASTtrack. A versatile aluminum framing system for unlimited screen porch configurations, complex screening and expansive openings.
How To Get The Best Porch Roof Framing Design — Randolph Indoor and
Before. Although the original builders built a beautiful home, focusing on a few front porch construction details will add a new dimension and plenty of curb appeal. Note the round porch columns which are not necessarily proportional to the architecture of the home. In addition, the front door gets lost on the front of the home and the porch.
The Most Impressive Porch Construction Details Ideas Ever Seen 19
Hold a screen panel against the ceiling and floor cleats. On the six-foot step ladder, drill two holes at top, through both the screen frame and the ceiling cleat. Insert two 3 1/2-inch bolts through the holes and add washers and wing nuts to the back. Repeat at the floor cleat.

Wood Porch Framing Details Porch wood, Porch beams, Deck footings
For comfortable seating, a porch needs to be at least 6 feet deep. If you'd like a table for outside dining, you need at least 10 feet of depth. Width depends on the house. A porch can partially cover the front of the house, mainly offering shelter to the front door. It also can run the width of the house or wrap around it.
Clopton House Front Porch Framing
Affix the ledger board, which runs the width of the porch and attaches the porch to the house. Remove siding, if necessary, in this section using a utility knife to help. Strike a level line with the laser level. Attach the ledger board at the desired height with the 1/2-inch lag screws, using the ratchet wrench.